
- Click on “Incoming” from the short cut menus as shown below. This will open the “Incoming Transfers” window.

- Specify your period of interest in the date section and click the generate button as shown below.

- From the left side of the windowpane, choose the transfer you want to receive into inventory as shown below. A white transfer listing means it is a new transfer unto the system, yellow means some items on the transfer have been received into inventory, teal means all items on the transfer have been received and grey means the transfer has been cancelled.
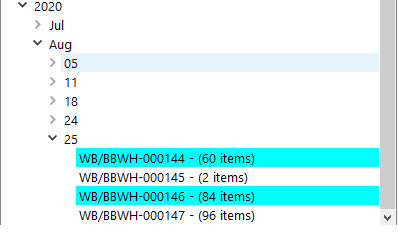
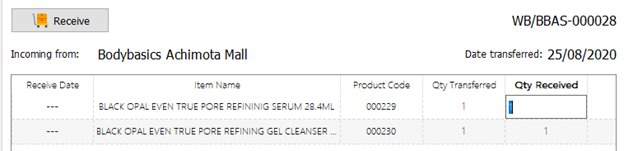
- Click on a transfer to display its details in the right pane of the window as shown below. Quantity received can be edited in the window as shown below, given that there are any disparities between quantity transferred and what is delivered and received.
- Click “Receive” once everything is confirmed, as shown below
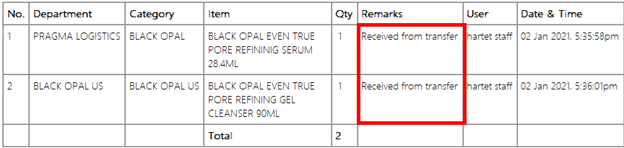
- Confirm receipt of the transfer by checking your inventory quick reports. Access it by clicking “Quick Reports”, “Inventory”, “Stock Received” and then to “Today’s Deposits”, as shown below.

- As shown below, the report will show that inventory was received from a transfer unto the system.
HOW TO RECEIVE INVENTORY FROM A TRANSFER
Updated on May 11, 2022
Need Support?CONTACT SUPPORT